A friend of mine emailed me the other day asking for some vegetarian recipes. She and her family will be going meatless for the first 21 days in January. Being a long-time vegetarian and avid (to put it mildly) cook, I (naturally) said I would oblige. So, for the first 21 days of January, I will be throwing in some veggie recipes for lots of fun things as well as some meal planning ideas. I'm thinking of putting a "What's for dinner" column on the sidebar to show our daily dinners.
Vegetarian cooking doesn't have to be difficult or intimidating. Many things we eat can be easily made vegetarian - soups, pizza, pasta, stir-fry,...
Today, I thought I'd give you a brief description of what is in my pantry/fridge/freezer, with a strong emphasis on what I consider must-haves. There is a ton of variation on what you can stock a vegetarian pantry with. Some people have the time and desire to make many things from scratch. Some people choose to purchase things ready made. Either approach can work. They both have their advantages and disadvantages. Meal preparation should be enjoyable. And the more you enjoy preparing your meals, the better they will taste! So, do what you feel you can and would like to do as far as the basics.
I always try to keep in mind: the more whole the food is, the better it is for you. Choosing the least processed foods will keep your pantry stocked with healthy options.
Please note that these lists are not complete lists of what I stock. Just highlighting the basics here.
Basic Pantry:
dried beans (I most often use garbanzo, lentils, green split peas, navy, and black beans)
*note: canned beans can replace dried beans for convenience, but they are more costly)
cans of refried beans (because I don't have the desire to make my own)
tomato sauce (I can my own, but any that you like will be wonderful)
tomato puree (ditto above)
tomato paste (I don't can my own of this...)
veggie broth
oats
flours for breads, muffins, and other yummy treats
cornmeal
quinoa (pronounced keen-wa. a grain that can be used in place of rice. more on quinoa later)
rice
popcorn
herbs and spices
packaged pasta
salsa
applesauce
canned pears
olive and canola oils
My Freezer (contains lots of fresh-frozen garden veggies):
brocolli
cauliflower
green beans
corn
sliced peppers
shredded zucchini
whole wheat tortilla shells (oh how we love to use these!)
sliced fruits and berries
homemade veggie burgers
The Fridge:
local organic eggs
local organic cheeses
homemade yogurt
fresh veggies especially including beets, carrots, lettuce, cabbage
tofu
seitan (a wheat gluten protein)
soy and rice milks
earth balance (a vegan butter substitute containing no hydrogenated oils)
I tend to shy away from the soy meat products that are flooding the market today. They are tasty and fun, and we do partake in them on occasion. But on the whole, I don't think they are very healthy. Often, they contain way more salt than one wants to consume. They are highly processed, and typically contain soy protein isolate - which is when they extract the protein from the soybean. I am a whole foods advocate in general, and can't help but think that there is something mainly unhealthy about extracting only one part of a whole food. The jury is still out on whether or not this type of protein is beneficial or harmful. You can find both arguments out there. I, for myself and for my family, prefer to eat them only every so often.
I'm sure there is a lot I have forgotten to list.

Thursday, December 30, 2010
Tuesday, December 28, 2010
Slowing Down
Christmas has come and gone. And after having the stomach flu, I'm taking some time to just slow down and relax. We had a fun holiday week filled with family, friends, good food, and great fun.
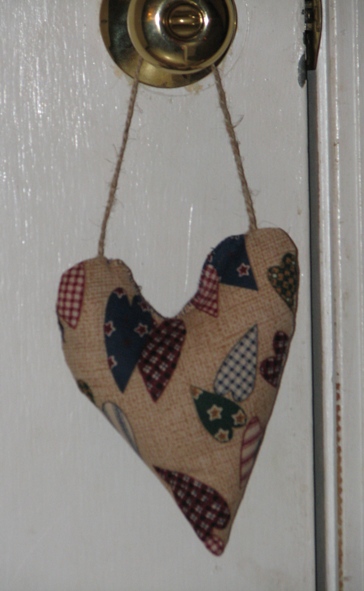
I finished up some last minute gifts at the, well... last minute. One was for my parents, who asked for someone they know who sews to make them a door snake for their drafty door. Guess who that was?!?!?! So, I searched the net and found this tutorial which I loved and had fun both reading and following. Here's my completed version:

I used some fun heart fabric that I found in a hand-me-down bag (I love those!). The fabric grew and grew on my until I was inspired to make this whimsical door knob hanger to go with it.

I also finished up my handmade gift to my KK - a twine bag and 3 organic cotton washcloths.

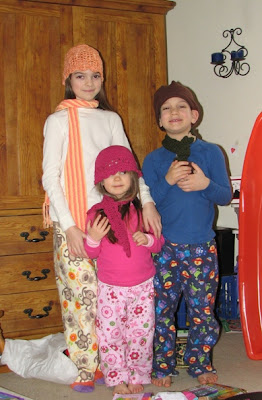
The kids loved their pj pants and scarf/hat sets. Which, of course, pleased me tremendously. :o)
Hope you all had a lovely holiday!!
I finished up some last minute gifts at the, well... last minute. One was for my parents, who asked for someone they know who sews to make them a door snake for their drafty door. Guess who that was?!?!?! So, I searched the net and found this tutorial which I loved and had fun both reading and following. Here's my completed version:

I used some fun heart fabric that I found in a hand-me-down bag (I love those!). The fabric grew and grew on my until I was inspired to make this whimsical door knob hanger to go with it.
I also finished up my handmade gift to my KK - a twine bag and 3 organic cotton washcloths.

The kids loved their pj pants and scarf/hat sets. Which, of course, pleased me tremendously. :o)

Hope you all had a lovely holiday!!
Friday, December 24, 2010
Wishes
Wishing you all the best holiday season filled with good friends and family, lots of cheer, and plenty of the things you love.
Thursday, December 23, 2010
In the Midst of Final Preparations
Here at our house, we are scrambling to finish the last of the Christmas preparations. Nick has been home all week. We've been enjoying our time together.
Baking...

Making gifts for one another.

Here are 2 of Sweetpea's ornament creations that I'm sure are to become favorites of their recipient.


And crocheting... I finally finished the scarf and hat set for Munch. Well, it's really not a set. Munch loves accessories. I made her a scarf for her birthday as well. All have some shade of orange in them (her favorite color) so they can be mixed and matched at will. None of them "go" together. But, that totally suits her style.

Here's the scarf. I followed the Icarus Scarf pattern on the Purl Bee website. Loosely followed, really. I wanted to make the whole thing, just as is, from start to finish. But it was a last minute plan of mine (I have those often). And I had this corn fiber yarn from Kollage Yarns that I wanted to try in a similar color scheme. So I went with it. Munch is only 11, so I shortened the scarf to 250 chains. And then I ran out of yarn (that's what tends to happen with my last minute plans), so I couldn't finish all the rows. Since it was a smaller scarf, I then decided to shorten the fringe from 6 inches to 4.

The corn yarn is really soft and has a nice sheen to it. It's made in the USA. From corn. Which always fascinates me. It's called Corntastic by Kollage Yarns.
Her hat is the Lacy Scallop Hat found on the Ravelry site.

I used this really great cotton/rayon blend yarn called Cotton Blossom Yarn by Dixie (also made in the USA) in tangerine. I absolutely love how you can see the shiny rayon fibers crinkled in with the cotton fibers. It was easy to stitch with. The hat looks better in person. Someday, I may even take a better pic of it on Munch and post it.
Nick has been wanting to get some molds to start a gingerbread house making tradition with our kids. In the meantime, I picked up a kit for them to start on. They had fun putting that together last night.

We still have a lot of things to do - ice cookies, bake a few more, make a gift for my parents, finish putting together the rest of Sweetpea's ornament creations, make food for gatherings, clean... I'm working very hard at staying sane. Right now, i'm taking a little break. Everything will wait for me while I recharge my batteries a bit...
Friday, December 17, 2010
Some Homemade Gift Ideas
Every year, for 11 years now, I have gotten together with 2 of my sisters to make birthday calendars for our family. We come from a large family - 7 children (I know "seven children! seven!!" Sounds like the Sound of Music). There are now 11 kids in the next generation. We have organized this to keep track everyone's birthdays. Each year, we pick a new theme for the calendar. One year we featured each grandkid and their favorite things (I'm really not trying to make this sound more and more Sound of Music-ish. Really). Another year, we highlighted each of our favorite movies. Sometimes they involve a lot of work - like the year we did pictures out of the grandkids hand, foot, and fingerprints. And some years it's less work - like our 10th anniversary calendar where we simply highlighted our previous calendars.
I've been pushing hard to get all the homemade gifts done by the end of this weekend. I would really like to enjoy the week leading up to Christmas. Relaxing, ya know.
So, I finished up the last car organizer.

They are quite fun to make, and really don't take all that much time. And they are so handy in the car.
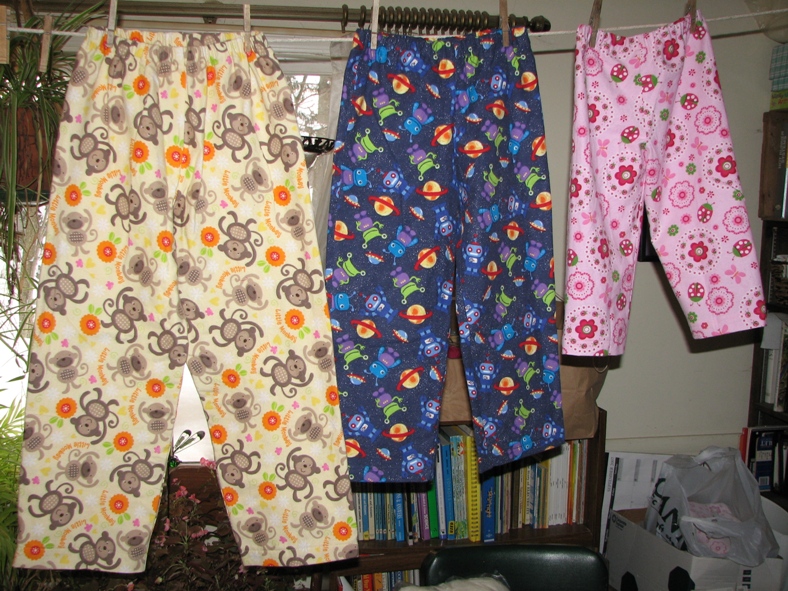
I finally finished up a pair of pj pants for each of my kids. They will have to wait until after Christmas to get their tops. I had a brain malfunction while buying cotton flannel, and didn't buy enough. When I went back, there was none left. So, now I'll have to be creative...

Tonight, I'm going to try to finish up Munch's scarf while me and Boy watch Cars.
All in all, I think things are coming along fairly well.
How are your holiday preparations coming along?
I've been pushing hard to get all the homemade gifts done by the end of this weekend. I would really like to enjoy the week leading up to Christmas. Relaxing, ya know.
So, I finished up the last car organizer.

They are quite fun to make, and really don't take all that much time. And they are so handy in the car.
I finally finished up a pair of pj pants for each of my kids. They will have to wait until after Christmas to get their tops. I had a brain malfunction while buying cotton flannel, and didn't buy enough. When I went back, there was none left. So, now I'll have to be creative...
Tonight, I'm going to try to finish up Munch's scarf while me and Boy watch Cars.
All in all, I think things are coming along fairly well.
How are your holiday preparations coming along?
Thursday, December 16, 2010
Car Organizer Tutorial
Today, I'm posting my first sewing tutorial!! I'm rather excited that this finally came together. I've been wanting to find the time since June! I had 2 to make for my Christmas giving. Seemed like the perfect opportunity to put it together. Anyway, let's get straight to it...
This is a basic over the seat car organizer. There's plenty of room and plenty of pockets to keep all your kid's stuff off the floor and organized within their reach.
Car Organizer
Finished dimensions = approximately 21"x17"
Top pocket is approximately 6 1/2" deep
Bottom pocket is approximately 9" deep

What you need to purchase:
3/4 yd main fabric (I used cotton quilter's fabric)
fat quarter coordinating fabric for pockets (again, cotton quilter's fabric)
1/2 yd 1 inch webbing
1 yd 1 inch elastic
batting
Cutting your materials:

- Out of your main fabric, cut 2 pieces 22"x18".
- Cut your batting to be just a hair larger than 22"x18". Sometimes batting shifts in ways you can't imagine. Cutting it slightly larger helps eliminate frustration - which is always helpful!
- For the top pocket, cut your coordinating fabric 7.5"x17.5".
- For the bottom pocket, cut another piece of your coordinating fabric 10"x17.5".
- Cut the 1 inch wide webbing to 18".
- Finally, cut your 1 inch wide elastic to 33". (You can measure around your car seat to ensure that this will be enough.)
Sewing your car organizer:
Step 1: Lay your main pieces of fabric so that they are right sides together. Then lay the whole thing over your batting.

Pin the 2 long sides almost to the bottom, and pin in the middle to make the whole thing more stable.
Step 2: Pull back the very bottom of the top layer of your sandwich (the part that will be your bottom hem). Place the elastic 1 1/2" from the bottom of the fabric like so:

Make sure you put the raw edge of your elastic out (that part gets tucked into your seam). I left about 1 inch outside the raw edge of my material. Pin well. Do the same for the other side.
Now you should have your elastic pinned to either side of your organizer, and a bunch of it dangling around the middle. Pin this to your fabric so that you don't accidentally sew through it in the wrong place.

Position your top layer back where it goes (over the elastic) and pin in place around the rest of the sides and the bottom.

Step 3: Using a 1/2" seam allowance, sew down 1 side, across the bottom, and up the other side, leaving the top open.

Unpin and trim the batting, but not the elastic.
Step 4: Fold back the elastic over the fabric and sew over the elastic just to the outside of your existing seam. This will reinforce the seam. Like this:

Step 5: Trim corners, turn right side out, and press.

Now, you should have something that looks like this:

Step 6: Fold the top seam into itself 1/2". Press.
Insert about 1" of the webbing into the top seam space 4" from either side. Pin well.

Starting at the top left corner, topstitch all the way around the organizer using 1/4" seam allowance. Go back over the webbing once to reinforce.

Unpin elastic so it will be out of your way when you attach the pockets. Pockets are next, then you're done!
Step 7: Prepare each pocket. Fold in 1/2" on each side. Press. Fold in the bottom corners like this:

Fold the bottom up 1/2". Press. This makes a neat corner.

Create a 1/4" rolled hem for the top of the pocket. Stitch the top hem. Do this for both pockets.
Step 8: Position your pockets onto the organizer. The bottom of the bottom pocket should line up with the bottom seam of your organizer. Pin the pocket in place.
Position the top pocket 3" down from the top of the car organizer. Pin in place.

Step 9: Now you can mark where you want the divisions to be for individual pockets within each large pocket. You can pretty much do whatever you want here. Here are the sizes that work well for us:
Top pocket: Mark for a seam at 5" from the left, again at 10" from the left, and once more at 12" from the left. This gives you 4 pockets approximately sized at 5", 5", 2", and 5". Perfect for small notebooks, colored pencils, pens, etc.
Bottom pocket: Mark for a seam at 6 1/2" from the left. This gives you 2 pockets approximately sized at 6" and 11". The bigger pocket holds a standard sized coloring book nicely.
Step 10: Sew your pocket divisions. Be sure to back tack at the top and bottom.

Guess what!!! You're all done!

To hang it in your car, it helps to remove the headrest first. Position the elastic over the seat, and wriggle it down all the way to the bottom. Put the headrest back making sure the webbing is around the spokes.
Fill it with stuff to occupy your kid for hours in the car. You can modify this design to include different pocket sizes if you have smaller things you want to have room for like MP3 players and whatnot.
Wednesday, December 15, 2010
Boy, Do We Have The Snow!!!
We've got lots of snow here in NE Ohio!! LOTS!!! The picture below was taken out the window of my back room. There are bushes directly below the window ledge, and snow piled high on top of that!

Venturing out the back door...


Most of the schools around here were closed. Since we homeschool, I don't follow the snow schedule. We can work same as usual here even when the snow is up to the car's headlights. Munch is unhappy with this. I keep having to remind her that we take plenty of "nice weather" days and play outside or go on outings instead of working indoors at home. Ahhhhh. The beauty of homeschooling - setting your own schedule.


Do you have lots of snow?
Tuesday, December 14, 2010
Drawstring Backpacks

I've finally finished all 6 of the drawstring backpacks!!! All are fated to be Christmas gifts for various young people in my life.
These backpacks are fairly easy to sew, and you can have TONS of fun playing around with color and style. I follow Anna's (from Noodlehead) basic drawsting backpack tutorial (only I do a few things differently).


All of my measurements for each piece of fabric comes from Anna's tutorial. However, I piece together the pocket differently. For the patchwork pockets, I sew the 2 pieces (top and bottom) together. Then, I follow the Sew, Mama, Sew Blog's Zippered Pocket Tutorial to complete the lined pocket. I line up the zipper with the seam between the top and bottom piece.


The above backpack is made from some of the vintage fabric passed along to me from my mother when they moved from their house into an apartment a few years back. I'm not sure exactly when it's from, but I love it. For this one, I used only one piece of fabric for the pocket. I didn't want to take too much away from the main fabric.
To assemble the backpack, I follow Anna's instructions.
Each backpack is fully lined, and the perfect size for a young person to carry around.

This pocket-less one is going to serve as Sweetpea's new dance bag. Munch and Boy are going to paint some things on the front of it to make it special for her. I lined it with pink (her favorite color), and used the same material for the tabs at the bottom.


They come together fairly quickly, and can make the perfect gift for someone - alone or stuffed with some goodies. It's been my go-to gift for birthdays and such this whole year!

(If all goes well, on Thursday, I should have my first ever tutorial of my very own to post! I'm so excited about this. Fingers crossed.)
Monday, December 13, 2010
Snowman Garland

Today, we made snowman garland. I got the idea from a Family Fun book at the library, but decided to change some things to suit my preferences. For one, the original craft called for craft foam. But I don't care for craft foam, so I opted for stiffened felt (which can be purchased at any decent craft store) instead.
Using glasses, we started off cutting the felt into 2 different sized snowmen.

Then we went to town using every thinkable thing to decorate our snowmen - googly eyes, snowflakes, puff balls, felt for hats, fabric for scarves and hats, bells, ribbon, etc.


We used an all purpose craft glue to stick everything on, but I'd have to say, next time (if there was such a time) I would definitely be using something stronger like hot glue or a fabric glue. Lots and lots of our little items fell off to everyone's dismay.
We kept all the little craft items organized by using saucers. You could use little take out dressing cups or little bowls instead if that's what you've got. But it's helpful for keeping down messes and for easier cleanup.

All in all, we had a grand time, and our little creations turned out rather cute.


After they dried, I punched holes where the arms would be.

Using a tapestry needle, I threaded ribbon into the front of the left side, around the back, and out on the right side.


But, in hanging them, I realized that they were top heavy and tended to flip over. Not very good unless you want a string of snowmen standing on their heads. To fix this, I just made sure they were all leaning against the wall - not dangling in space.

If you want them to hang freely in space, you may want to consider weighting them somehow. I tried to think of something quick and easy, but frankly, I was done with the project. So, my fix by leaning them all on the wall was perfect for me!
What sorts of things are you making for Christmas this year?
Subscribe to:
Posts (Atom)